Roof Flashing Types: The Complete Guide to Protecting Your Roof
Understanding Roof Flashing: Your First Line of Defense
What Is Roof Flashing?
Roof flashing is a critical component of any roofing system, acting as a waterproof barrier at the most vulnerable points of your roof. Made from thin, impervious materials, flashing directs water away from seams, joints, and openings where different roof elements meet. Without proper flashing, even the best roofing materials can’t prevent water damage.
Why Flashing Is Essential
- Prevents water infiltration: Seals gaps where shingles alone can’t provide protection
- Protects structural integrity: Keeps water out of roof decking and framing
- Extends roof lifespan: Reduces deterioration from moisture damage
- Prevents mold and rot: Stops water from entering wall cavities and attics
- Maintains home value: Prevents costly water damage repairs
Common Roof Flashing Materials
Material Comparison
| Material | Lifespan | Cost | Best Uses | Pros & Cons |
|---|---|---|---|---|
| Aluminum | 20-30 years | $ | General purpose, residential | ✓ Lightweight, affordable ✗ Can corrode near salt water |
| Copper | 70+ years | $$$$ | Premium homes, historic buildings | ✓ Extremely durable, attractive ✗ Expensive, requires skilled installation |
| Galvanized Steel | 20-25 years | $$ | Commercial, high-wind areas | ✓ Strong, rust-resistant ✗ Can rust if coating damaged |
| Lead-Coated Copper | 100+ years | $$$$$ | Historic restoration | ✓ Longest lasting ✗ Very expensive, specialized |
| PVC/Rubber | 10-20 years | $ | Vent pipes, temporary repairs | ✓ Easy installation, flexible ✗ Shorter lifespan, UV degradation |
Major Types of Roof Flashing
1. Step Flashing
Installation: Individual L-shaped pieces installed with each shingle course
Key Features:
- Typically 10″ long by 2″ × 8″ (or custom sizes)
- Overlaps by at least 2 inches
- Works with roof’s natural water flow
- Must be installed with both roofing and siding
Step Flashing Best Practices
- Install new step flashing when re-roofing
- Never reuse old step flashing
- Ensure each piece overlaps the one below
- Seal nail heads with roofing cement
2. Valley Flashing
Types: Open valley, closed valley, and woven valley
Materials: W-shaped metal or rolled roofing
Critical Considerations:
- Handles high water volume
- Minimum 24″ wide for proper protection
- Ice and water shield recommended underneath
- Most vulnerable to leaks if improperly installed
Valley Flashing Options
- Open Valley:
- Metal flashing visible
- Best water flow
- Easier to maintain and inspect
- Closed Valley:
- Shingles cover flashing
- More aesthetic appeal
- Requires careful installation
- Woven Valley:
- Shingles interlaced across valley
- No exposed flashing
- Not recommended for architectural shingles
3. Drip Edge Flashing
Installation Location: Along all roof edges (eaves and rakes)
Code Requirements: Mandatory in most building codes since 2012
Benefits:
- Prevents water from wicking back under shingles
- Protects roof decking edges
- Provides clean, finished appearance
- Supports shingle edges
Drip Edge Installation Sequence
- Install eave drip edge first (before underlayment)
- Apply ice and water shield over drip edge at eaves
- Install underlayment
- Install rake drip edge over underlayment
- Overlap corners minimum 2 inches
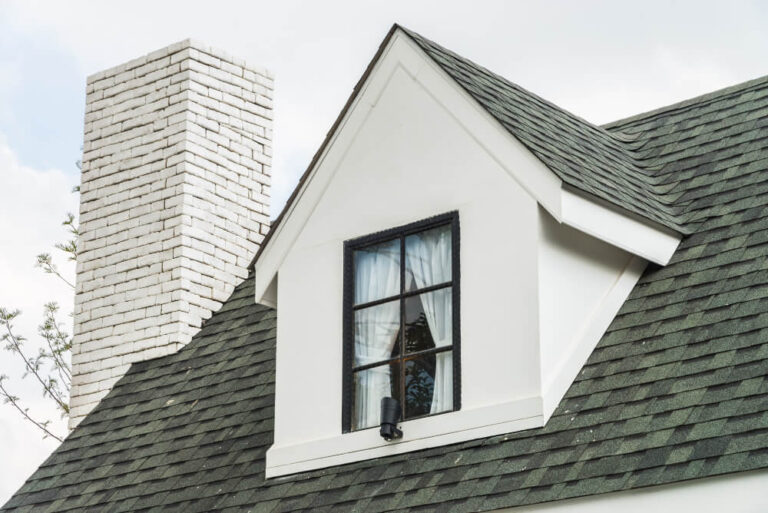
4. Chimney Flashing
Chimney flashing is one of the most complex flashing installations, requiring multiple components working together:
Chimney Flashing Components
- Step Flashing: Along the sides of the chimney
- Front Apron Flashing: Across the lower front of chimney
- Back Pan (Cricket): Diverts water around upper side
- Counter Flashing: Covers top of step flashing, embedded in mortar
5. Vent Pipe Flashing (Boot Flashing)
Types:
- Rubber boot with aluminum base
- All-rubber boots
- Lead boots (traditional)
- Copper or galvanized steel
Installation Tips
- Size boot to pipe diameter (1.5″, 2″, 3″, 4″ common)
- Slide under upper shingles, over lower shingles
- Seal with roofing cement
- Replace rubber boots every 10-15 years
6. Skylight Flashing
Skylight flashing requires careful integration with the roofing system:
Components Include
- Head flashing: Across the top
- Sill flashing: Across the bottom
- Step flashing: Along both sides
- Underlayment integration: Ice and water shield recommended
Specialized Flashing Types
Continuous Flashing (Apron Flashing)
- Long, single piece of flashing
- Used where vertical surfaces meet roofing
- Common at dormers and additions
- Requires expansion joints for long runs
Saddle Flashing (Cricket)
- Peaked structure behind chimneys or other projections
- Diverts water around obstacles
- Required by code for chimneys over 30″ wide
- Can be built with wood and covered with metal
Kickout Flashing
- Diverts water away from wall intersections
- Prevents water infiltration into siding
- Critical at roof-to-wall intersections near gutters
- Often missing on older homes
Counter Flashing
- Covers top edge of base flashing
- Embedded into masonry or siding
- Creates two-part flashing system
- Allows for building movement
Flashing Installation Best Practices
General Installation Guidelines
- Layer Properly: Follow the “shingle principle” – upper pieces overlap lower
- Secure Adequately: Use appropriate fasteners for material type
- Seal Carefully: Use compatible sealants, avoid over-sealing
- Allow Movement: Don’t restrict thermal expansion/contraction
- Maintain Clearances: Keep required distances from roof surface
Common Installation Mistakes to Avoid
- Reusing old flashing: Always install new flashing during re-roofing
- Incorrect overlap: Minimum 2″ overlap, 4″ recommended
- Wrong fasteners: Using steel nails with copper flashing causes corrosion
- Inadequate sealant: Using wrong type or relying solely on caulk
- Poor integration: Not properly weaving with roofing materials
Maintenance and Inspection
Regular Inspection Schedule
| Timeframe | Inspection Tasks | What to Look For |
|---|---|---|
| Twice yearly | Visual inspection from ground | Visible damage, rust, missing pieces |
| After storms | Check vulnerable areas | Lifted edges, impact damage |
| Every 3-5 years | Professional inspection | Sealant condition, hidden damage |
| During gutter cleaning | Check accessible flashing | Debris buildup, separation |
Signs of Flashing Problems
- Interior signs:
- Water stains on ceilings or walls
- Peeling paint near chimneys or walls
- Mold or mildew in attic
- Exterior signs:
- Rust stains on flashing
- Visible gaps or separation
- Missing or damaged sealant
- Bent or dented metal
Cost Considerations
Flashing Installation Costs
| Flashing Type | Material Cost/Linear Foot | Installation Cost | Total Average Cost |
|---|---|---|---|
| Drip Edge | $2-5 | $4-7/ft | $6-12/linear foot |
| Step Flashing | $5-10 | $10-15/ft | $15-25/linear foot |
| Valley Flashing | $15-25 | $30-50/ft | $45-75/linear foot |
| Chimney Flashing | $200-500 | $300-800 | $500-1,300 total |
| Skylight Flashing | $150-300 | $200-500 | $350-800 per skylight |
Factors Affecting Cost
- Material choice: Copper costs 3-4x more than aluminum
- Roof complexity: More intersections mean more flashing
- Accessibility: Steep or high roofs increase labor costs
- Regional differences: Labor rates vary by location
- Repair vs. replacement: Full replacement during re-roofing is most cost-effective
Frequently Asked Questions
Q: How long does roof flashing typically last?
A: Flashing lifespan varies by material: aluminum lasts 20-30 years, galvanized steel 20-25 years, copper 70+ years, and rubber boot flashings typically need replacement every 10-15 years. Proper installation and maintenance can extend these lifespans significantly.
Q: Can I install flashing over existing shingles?
A: While some repairs can be made over existing shingles, proper flashing installation requires integration with the roofing system. For best results and warranty compliance, flashing should be installed or replaced during roofing work, not added on top.
Q: What’s the difference between step flashing and continuous flashing?
A: Step flashing consists of individual L-shaped pieces installed with each shingle course, allowing for roof movement. Continuous flashing is one long piece. Step flashing is superior for walls because it prevents water from traveling laterally if one section fails.
Q: How do I know if my flashing needs replacement?
A: Signs include visible rust or corrosion, gaps between flashing and roof surface, loose or missing sections, water stains inside your home, and deteriorated sealant. If flashing shows any of these signs or is over 20 years old, have it professionally inspected.
Q: Is flashing required by building code?
A: Yes, most building codes require flashing at all roof penetrations, intersections, and edges. Specific requirements vary by region, but the International Residential Code mandates flashing installation at chimneys, valleys, and roof edges.
Q: Can I paint roof flashing?
A: Yes, but use appropriate metal primer and paint. Painting can extend flashing life by protecting against corrosion. However, copper flashing develops a protective patina naturally and shouldn’t be painted unless you want to maintain a specific color.
Q: What’s a cricket, and when is it needed?
A: A cricket (or saddle) is a peaked structure that diverts water around chimneys or other roof projections. Building codes typically require crickets for chimneys wider than 30 inches to prevent water pooling and ice dam formation.
Q: Should flashing be caulked?
A: Flashing should be mechanically fastened and integrated with roofing materials, not rely solely on caulk. While sealant can supplement flashing at certain points, over-caulking can trap water and cause more problems. Use sealant sparingly and only with compatible materials.
Q: Can damaged flashing be repaired, or must it be replaced?
A: Minor damage like small holes or loose sections can often be repaired with patches or sealant as temporary fixes. However, extensively corroded, bent, or improperly installed flashing should be replaced to ensure long-term protection.
Q: Why is copper flashing so expensive?
A: Copper flashing costs more due to high material costs, but offers exceptional longevity (70+ years), develops an attractive patina, requires no painting, and won’t rust. For historic homes or when long-term value is prioritized, copper’s durability justifies the investment.
Conclusion: Protecting Your Investment with Proper Flashing
Roof flashing represents a small percentage of your roofing system’s cost but plays an outsized role in protecting your home from water damage. Understanding the different types of flashing and their specific applications helps ensure your roof performs as designed for decades.
Key Takeaways:
- Flashing is essential at all roof transitions and penetrations
- Different locations require specific flashing types
- Material choice affects longevity and cost
- Proper installation is critical—this isn’t a DIY project for amateurs
- Regular inspection and maintenance prevent costly water damage
- Replace flashing when re-roofing for best results
- Invest in quality materials for long-term protection
Whether you’re planning a roof replacement, addressing a leak, or simply maintaining your home, understanding roof flashing types helps you make informed decisions. Work with qualified roofing professionals who understand proper flashing installation, use quality materials, and follow manufacturer specifications and building codes. Your home’s protection depends on getting these critical details right.