What Is Rubber Roofing?
Understanding EPDM Rubber Roofing
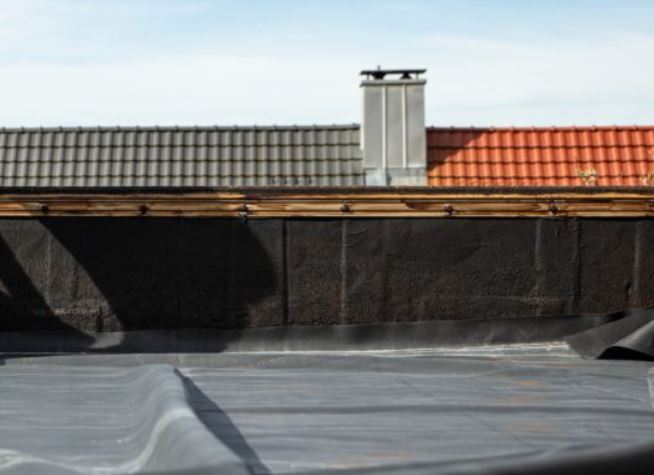
Rubber roofing represents one of the most time-tested and reliable flat roofing solutions available today. First introduced in the 1960s, EPDM (Ethylene Propylene Diene Monomer) has protected millions of buildings worldwide for over six decades. This synthetic rubber compound offers unmatched durability and weather resistance, making it the go-to choice for many commercial and residential flat roof applications. Unlike pitched roofing options such as hip roofs or gable roofs, rubber roofing is specifically designed for flat and low-slope applications.
EPDM Composition and Properties:
- Base Material: Synthetic rubber compound (ethylene, propylene, diene)
- Thickness Options: 45 mil (0.045″), 60 mil (0.060″), 90 mil (0.090″)
- Standard Widths: 10′, 20′, 30′, 40′, and 50′ rolls
- Colors: Black (standard), white (reflective option)
- Reinforcement: Available reinforced or non-reinforced
- Weight: 0.29-0.56 lbs per square foot
Types of Rubber Roofing Materials
1. EPDM (Most Common)
- Black EPDM: Original formulation, excellent UV resistance
- White EPDM: Reflective surface for energy efficiency
- Reinforced EPDM: Contains polyester or fiberglass scrim
- Fleece-backed EPDM: For fully adhered applications
2. Alternative Rubber Roofing
- Modified Rubber Shingles: Recycled rubber made to look like slate/wood
- Liquid Rubber: Applied as coating, forms seamless membrane
- Rubber Roof Tiles: Interlocking tiles from recycled materials
- Spray-Applied Rubber: Polyurethane foam with rubber coating
The Evolution of Rubber Roofing Technology
Historical Development
The journey of rubber roofing spans several decades of innovation:
- 1960s: Initial development for pond liners and roofing
- 1970s: First commercial building applications
- 1980s: Introduction of white EPDM for energy efficiency
- 1990s: Development of fleece-backed systems
- 2000s: Enhanced seaming technologies and warranties
- 2010s-Present: Improved formulations and thicker options
Benefits and Drawbacks of Rubber Roofing
✓ Advantages
- Exceptional Longevity: 25-50+ year lifespan
- Weather Resistance: Handles extreme temperatures
- Flexibility: Remains pliable in cold weather
- Low Maintenance: Minimal upkeep required
- Cost-Effective: Lower initial cost than many alternatives
- Proven Track Record: 60+ years of performance data
- Easy Repairs: Simple patching procedures
- UV Resistant: Doesn’t degrade from sun exposure
- Environmentally Friendly: Can be recycled
- Hail Resistant: Absorbs impact well
✗ Disadvantages
- Black Absorbs Heat: Can increase cooling costs
- Seam Vulnerability: Adhesive seams weaker than welded
- Shrinkage: Can pull away from edges over time
- Puncture Risk: Sharp objects can penetrate
- Aesthetic Limitations: Industrial appearance
- Oil Sensitivity: Petroleum products cause damage
- Installation Timing: Weather-dependent adhesives
- Ponding Water: Can accelerate deterioration
Rubber Roofing Installation Methods
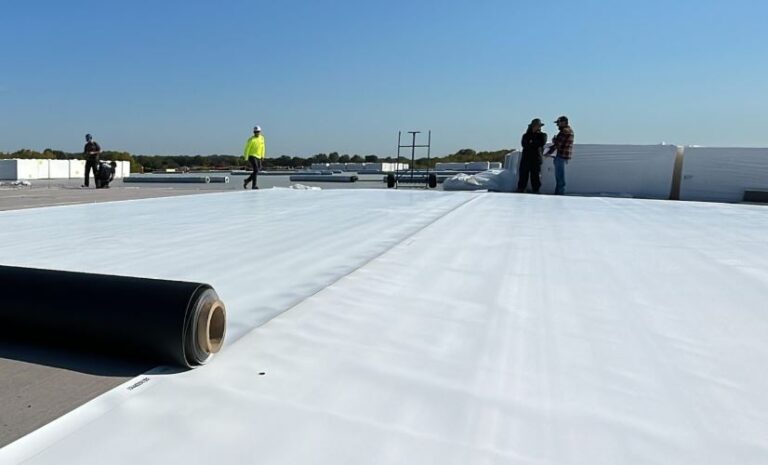
1. Fully Adhered System
Process Overview:
- Surface Preparation: Clean and prime substrate
- Adhesive Application: Bonding adhesive on deck and membrane
- Membrane Placement: Roll into wet adhesive carefully
- Seaming: Overlap edges 3-6 inches
- Best For: Contoured roofs, high-wind areas
- Wind Rating: Up to 200+ mph when properly installed
2. Mechanically Attached System
- Fastener Placement: Through reinforced strips or seams
- Spacing: 12″ O.C. field, 6″ O.C. perimeter
- Cover Strip: Additional EPDM strip over fasteners
- Advantages: Faster installation, less weather-dependent
- Limitations: Visible fastener strips
3. Ballasted System
- Loose-Laid Membrane: Minimal attachment at perimeter
- Ballast Material: River rock (10-12 lbs/sq ft minimum)
- Advantages: Lowest installation cost
- Disadvantages: Added weight, maintenance challenges
- Wind Limitations: Not suitable for high-wind zones
Step-by-Step Installation Process
Pre-Installation Requirements
- Deck Inspection:
- Verify structural integrity
- Ensure proper slope (¼” per foot minimum)
- Repair any damaged areas
- Weather Conditions:
- Temperature above 40°F for adhesives
- No rain or high winds
- Avoid extreme heat (over 90°F)
- Material Staging:
- Acclimate materials to roof temperature
- Organize by installation sequence
- Protect from weather
Installation Steps
Step 1: Install Insulation (if required)
- Mechanically fasten or adhere insulation boards
- Stagger joints to prevent thermal bridging
- Install coverboard for enhanced durability
- Ensure smooth, level surface
Step 2: Position Membrane
- Roll out sheets allowing for relaxation (30 minutes)
- Overlap edges per manufacturer specs (3-6″)
- Align sheets before final positioning
- Mark seam areas for adhesive application
Step 3: Secure Membrane
- Apply to both surfaces for contact adhesive
- Use proper roller to ensure contact
- Work in manageable sections
- Avoid adhesive on seam areas
- Allow proper flash-off time
Step 4: Seam Installation
- Clean seam areas with prescribed cleaner
- Apply seam primer if required
- Install seam tape or liquid adhesive
- Roll seams with proper pressure
- Check all seams with probe
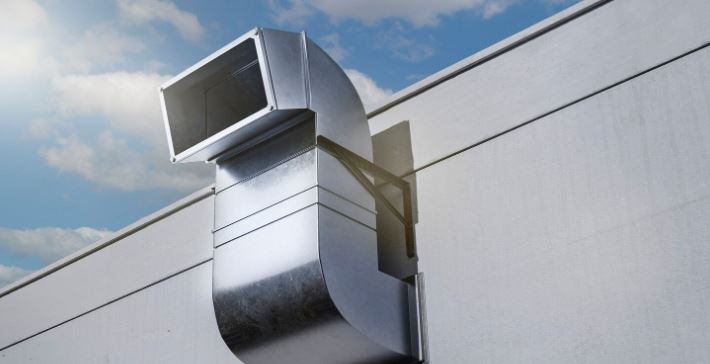
Step 5: Install Flashing
Proper roof flashing is critical for EPDM installations, especially at penetrations, edges, and transitions. EPDM-specific flashing materials must be used to ensure compatibility and long-term performance.
Rubber Roofing Costs Analysis
Material Costs Breakdown
When calculating materials, remember that roofing is typically measured by the roofing square (100 square feet). This standardized measurement helps you compare costs and estimate materials accurately.
| Component | Cost per Square Foot | Notes |
|---|---|---|
| 45 mil EPDM Black | $0.65 – $0.85 | Standard residential |
| 60 mil EPDM Black | $0.80 – $1.10 | Commercial standard |
| 90 mil EPDM Black | $1.25 – $1.65 | Heavy-duty applications |
| White EPDM (60 mil) | $1.10 – $1.40 | Energy-efficient option |
| Adhesives/Primers | $0.35 – $0.55 | Fully adhered system |
| Insulation (per inch) | $0.55 – $0.85 | If required |
| Flashings/Accessories | $0.25 – $0.45 | Varies by complexity |
Total Installation Costs
Complete System Pricing (per square foot):
- Residential (45 mil): $4.00 – $6.00
- Commercial (60 mil): $4.50 – $7.50
- Premium (90 mil): $6.00 – $9.00
- Tear-off existing: Add $1.50 – $3.00
- Insulation upgrade: Add $1.50 – $2.50 per inch
Cost Comparison: 10,000 Square Foot Roof
| System Type | Material Cost | Labor Cost | Total Cost |
|---|---|---|---|
| EPDM (60 mil) | $9,500 | $35,500 | $45,000 |
| TPO (60 mil) | $12,000 | $43,000 | $55,000 |
| PVC (60 mil) | $14,000 | $46,000 | $60,000 |
| Modified Bitumen | $11,000 | $39,000 | $50,000 |
Maintenance and Longevity
Routine Maintenance Schedule
Recommended Maintenance Timeline:
- Monthly: Visual inspection for obvious damage
- Quarterly: Clear drains and gutters
- Semi-Annual: Detailed inspection of seams and flashings
- Annual: Professional inspection and cleaning
- 5-Year: Recoat if using liquid rubber systems
- 10-Year: Major inspection and preventive repairs
Extending Rubber Roof Life
- Regular Cleaning:
- Remove debris promptly
- Use mild detergent and soft brushes
- Avoid petroleum-based cleaners
- Prompt Repairs:
- Address punctures immediately
- Re-secure lifted seams
- Replace damaged flashings
- UV Protection:
- Consider protective coatings for black EPDM
- Apply manufacturer-approved products only
- Prevent Ponding:
- Ensure proper drainage
- Add crickets or tapered insulation if needed
Ventilation Considerations
Proper ventilation is essential even for flat roofs to prevent moisture buildup and extend membrane life. Understanding roof vent types helps ensure adequate airflow in the roof assembly, which is particularly important when EPDM is installed over conditioned spaces.
Common Rubber Roofing Problems
Issues to Monitor:
- Membrane Shrinkage: Pulling at perimeters and penetrations
- Solution: Re-secure edges, add expansion joints
- Seam Separation: Adhesive failure at overlaps
- Solution: Clean and re-adhere or use cover strip
- Surface Crazing: Fine cracks from UV exposure
- Solution: Apply EPDM restoration coating
- Punctures: From foot traffic or falling objects
- Solution: Apply EPDM patch with proper adhesive
Rubber Roofing Repairs
DIY Repair Guidelines
Small Puncture Repair (Under 2″)
- Clean area with EPDM cleaner
- Apply primer if required
- Cut patch 3″ larger than damage
- Round patch corners
- Apply adhesive to both surfaces
- Press firmly and roll edges
Seam Repair
- Clean both sides of separated seam
- Apply seam primer
- Install seam tape or liquid adhesive
- Use seam roller for proper adhesion
- Consider cover strip for added security
Insurance and Rubber Roofing
If your rubber roof has been damaged by storms, hail, or other covered events, you may be eligible for insurance coverage. Learn how to get insurance to pay for roof replacement by documenting damage thoroughly and working with qualified roofing contractors who can provide detailed assessments.
Environmental Impact and Sustainability
Eco-Friendly Aspects
- Recyclability: Can be ground up and reused
- Longevity: 25-50 year life reduces replacement frequency
- Manufacturing: Lower embodied energy than many alternatives
- Cool Roof Option: White EPDM reduces urban heat island
- Reusability: Can sometimes be removed and reinstalled
LEED and Green Building
- Recycled Content: Some EPDM contains post-consumer rubber
- Energy Efficiency: White EPDM qualifies for cool roof credits
- Durability Credits: Long lifespan contributes to sustainability
- Regional Materials: Often manufactured locally
- Low-Emitting Materials: Minimal VOCs during installation
Comparing Rubber Roofing to Alternatives
| Feature | EPDM Rubber | TPO | PVC | Built-Up Roof |
|---|---|---|---|---|
| Lifespan | 25-50 years | 15-30 years | 20-30 years | 15-25 years |
| Cost per sq ft | $4-8 | $5-10 | $6-12 | $5.50-9.50 |
| Installation | Moderate | Complex | Complex | Labor-intensive |
| Energy Efficiency | Good (white) | Excellent | Excellent | Poor |
| Repair Ease | Very Easy | Moderate | Moderate | Difficult |
| Flexibility | Excellent | Very Good | Good | Poor |
| Seam Strength | Good | Excellent | Excellent | N/A |
| Chemical Resistance | Moderate | Good | Excellent | Good |
When to Consider Pitched Roof Alternatives
If your building structure allows for a pitched roof, you may want to consider alternatives like metal roofing, which offers excellent longevity and can work on low-slope applications. For traditional pitched roofs, gable roofs and hip roofs offer superior drainage and a wider variety of roofing material options.
Warranty Options for Rubber Roofing
Manufacturer Warranties
| Warranty Type | Coverage Period | What’s Covered | Cost |
|---|---|---|---|
| Material Only | 10-20 years | Manufacturing defects | Included |
| System Warranty | 15-20 years | Membrane + accessories | $0.05-0.10/sq ft |
| NDL Warranty | 15-30 years | Full replacement coverage | $0.20-0.35/sq ft |
| Platinum/Ultimate | 20-30 years | All components + labor | $0.30-0.50/sq ft |
Warranty Best Practices
- Use Certified Contractors: Required for most system warranties
- Complete Documentation: Photos and installation details
- Regular Inspections: Often required annually
- Approved Repairs Only: Use manufacturer-specified products
- Transfer Provisions: Understand building sale implications
Frequently Asked Questions
Q: How long does rubber roofing last?
A: EPDM rubber roofing typically lasts 25-50 years with proper installation and maintenance. Black EPDM often outlasts white due to better UV resistance. Thicker membranes (60-90 mil) generally last longer than thinner options. Many installations from the 1980s are still performing well today.
Q: Can rubber roofing be installed over existing roofing?
A: Yes, EPDM can often be installed over existing roofing if the deck is structurally sound and local codes permit. However, wet insulation must be removed, and the surface must be smooth. Installing over existing roofing may affect warranty coverage and isn’t recommended if the existing roof has multiple layers.
Q: Is white or black EPDM better?
A: It depends on your priorities. Black EPDM lasts longer (typically 30-50 years vs. 25-30 for white) and costs less. White EPDM reflects heat better, reducing cooling costs by 20-30% in warm climates. Choose black for longevity and cold climates; white for energy efficiency in hot climates.
Q: Can I walk on rubber roofing?
A: Yes, EPDM can handle occasional foot traffic for maintenance. However, avoid walking on it during extreme temperatures (below 20°F or above 100°F), use soft-soled shoes, and install walk pads in high-traffic areas. Never drag equipment across the membrane.
Q: How do you repair tears in rubber roofing?
A: Small tears can be repaired using EPDM patches and appropriate adhesive. Clean the area thoroughly, apply primer if required, cut a patch 3-4 inches larger than the damage, round the corners, and adhere following manufacturer instructions. Larger tears may require professional repair or section replacement.
Q: Does rubber roofing shrink over time?
A: Yes, EPDM can experience some shrinkage, typically 1-2% over its lifetime. This is most noticeable at perimeters and penetrations. Proper installation with adequate material at terminations and regular maintenance checks can prevent shrinkage-related problems.
Q: What maintenance does rubber roofing require?
A: EPDM requires minimal maintenance: bi-annual inspections, keeping drains clear, removing debris, and promptly repairing any damage. Annual professional cleaning with appropriate products helps maintain appearance and performance. Avoid petroleum-based products and harsh chemicals.
Q: Can you paint or coat rubber roofing?
A: Yes, but only with manufacturer-approved EPDM coatings. Acrylic elastomeric coatings designed for EPDM can extend roof life, improve reflectivity, and seal minor surface crazing. Never use regular paint or non-compatible coatings, as they won’t adhere properly and may damage the membrane.
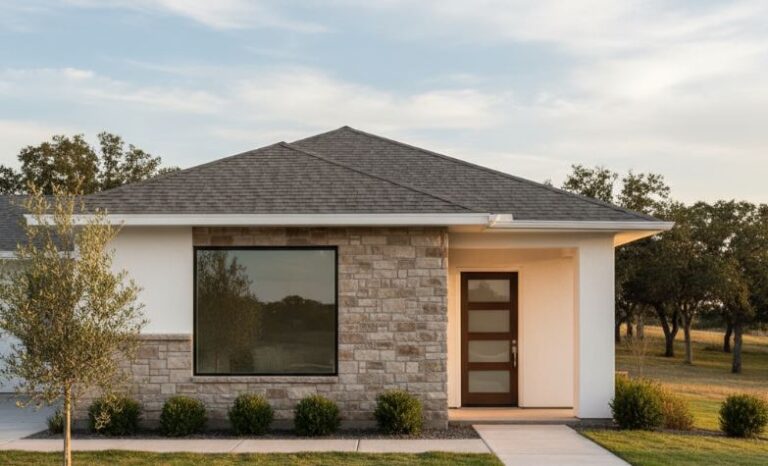
Q: Is rubber roofing good for residential homes?
A: Absolutely. EPDM works excellently for residential flat or low-slope roofs, including porches, garages, and modern home designs. It’s cost-effective, long-lasting, and can be made aesthetically pleasing with proper edge details and coatings. Many homeowners appreciate its low maintenance requirements.
Q: How does weather affect rubber roofing installation?
A: EPDM installation is weather-sensitive. Adhesives require temperatures above 40°F and dry conditions. Seaming is particularly critical – high humidity or cold can prevent proper adhesion. Unlike heat-welded systems, EPDM can’t be installed in light rain. Spring and fall typically offer ideal installation conditions.
Q: How does rubber roofing compare to TPO?
A: EPDM and TPO roofing are both excellent single-ply options with different strengths. EPDM costs less, has a longer track record (60+ years vs. 30 years for TPO), and is easier to repair. TPO offers superior energy efficiency with its white surface and has stronger heat-welded seams. Choose EPDM for proven longevity and lower cost; TPO for maximum energy efficiency.
When to Choose Rubber Roofing
Ideal Applications
- Large commercial buildings with simple roof designs
- Projects with tight budgets requiring proven performance
- Northern climates where black membrane heat absorption is beneficial
- Buildings with minimal rooftop equipment or traffic
- Retrofits over existing roofing systems
- Applications requiring maximum flexibility
- Projects where ease of future repairs is important
- Historic buildings requiring reversible roofing solutions
When to Consider Alternatives
- High foot traffic: Consider PVC or modified bitumen
- Maximum energy efficiency: TPO or white PVC may be better
- Chemical exposure: PVC offers superior resistance
- Aesthetic requirements: Consider standing seam metal
- Restaurant/grease exposure: Modified bitumen or PVC recommended
- Frequent equipment changes: Built-up roofing may be more suitable
- Pitched roof possible: Gable or hip roof with shingles or metal
Structural Considerations
Before installing rubber roofing, ensure your roof structure can support the system. Understanding the difference between rafters vs joists is important when evaluating your roof deck’s ability to support the membrane, insulation, and any ballast material if using a ballasted system.
The Future of Rubber Roofing
Innovations and Trends
- Advanced Formulations: Improved UV packages and flexibility
- Sustainable Materials: Increased recycled content
- Smart Membranes: Integrated moisture detection
- Enhanced Adhesives: Faster curing, stronger bonds
- Prefabrication: Larger sheets reducing field seams
- Hybrid Systems: Combining EPDM with other technologies
Market Outlook
Despite competition from newer single-ply membranes like TPO, EPDM maintains approximately 25% market share in commercial roofing due to its proven track record, cost-effectiveness, and reliability. The technology continues to evolve with improved formulations and installation methods ensuring its relevance for decades to come.
Conclusion: Is Rubber Roofing Right for Your Project?
Rubber roofing, particularly EPDM, represents one of the most reliable and cost-effective flat roofing solutions available today. With over 60 years of proven performance, exceptional durability, and one of the lowest lifecycle costs in the industry, EPDM continues to protect millions of buildings worldwide.
Key Takeaways:
- Proven Performance: 60+ years of successful installations
- Exceptional Value: Low initial cost with 25-50 year lifespan
- Weather Resistance: Handles temperature extremes better than most
- Easy Maintenance: Simple repairs and minimal upkeep
- Flexibility: Multiple installation methods for various applications
- Sustainability: Recyclable with low environmental impact
- Reliability: Predictable performance with proper installation
Whether you’re planning a new commercial building, replacing an aging roof, or looking for a cost-effective solution for your flat-roofed home, EPDM rubber roofing deserves serious consideration. Its combination of affordability, durability, and proven performance makes it an excellent choice for many applications.
Success with rubber roofing depends on proper design, quality installation, and regular maintenance. Work with experienced contractors familiar with EPDM installation requirements, choose the appropriate thickness and color for your application, and maintain the system according to manufacturer recommendations. With these elements in place, your rubber roof can provide decades of reliable, worry-free protection.